> For the complete documentation index, see [llms.txt](https://ahmed-tarek.gitbook.io/security-notes/llms.txt). Markdown versions of documentation pages are available by appending `.md` to page URLs; this page is available as [Markdown](https://ahmed-tarek.gitbook.io/security-notes/notes/qiuch-recon-methodology.md).
# Qiuch Recon Methodology
**Recon** is the process by which you collect more information about your target, such as subdomains, links, open ports, hidden directories, service information, etc. In this page, I will explain my web recon methodology.
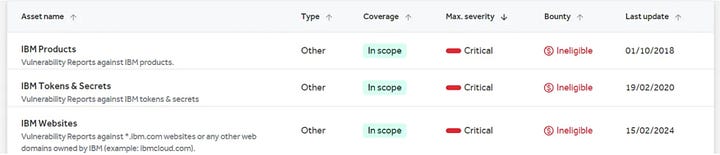
This approach may not work with all targets, as each target has its own scope. Some companies will list all their assets in scope
worldpay
sony
IBM
while others will list specific domains or subdomains. I will cover broader scopes to address all points.
**Quick Note**
Always use **WHOIS** data to verify each step. WHOIS provides information about domain name registrations, helping you confirm if an asset (like an IP or subdomain) belongs to your target.
#### 1. Collect Acquisitions
An acquisition means the company has bought another company, and the new assets they now own, like websites or apps, are included in the bug bounty program for testing. This includes all the companies under the control of the main company.
**How to Collect Acquisitions?** The best website for this is [Crunchbase](https://www.crunchbase.com/). By searching for the company name, you can find all the acquisitions they have made. Collect this information and add it to your target scope and start recon on them.
#### 2. Collect IPs
This involves various steps:
#### 2.1 Collect ASNs
An **Autonomous System Number (ASN)** is a unique identifier assigned to a network or group of IP prefixes controlled by a specific organization or provider. By identifying the ASNs related to your target, you can uncover a range of IP addresses potentially linked to them.
However, keep in mind:
* Not all IPs will be tied to ASNs directly owned by the organization, especially if they use cloud providers like AWS, Azure, or GCP.
* In such cases, identifying the IPs might require deeper investigation through other means.
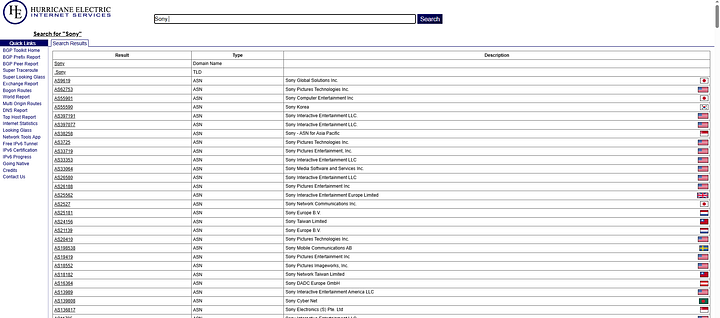
[**bgp.he.net**](https://bgp.he.net)**:** A great starting point. Search using the company name to find associated ASNs.
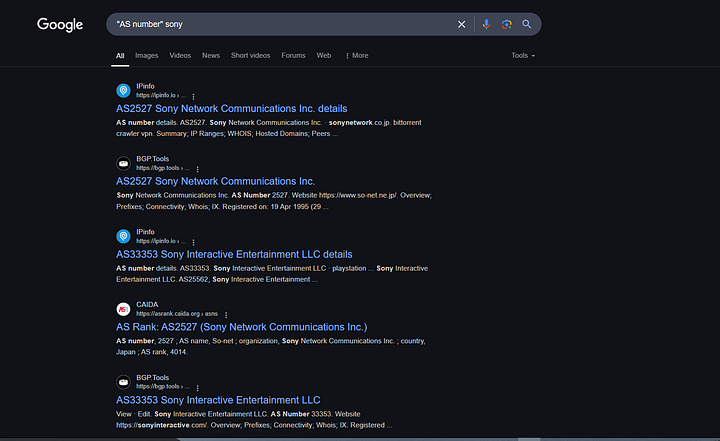
**Google Dorking:** Perform manual Google searches using queries like:
* `site:bgp.he.net `
* `"AS number" `
* `"Autonomous System" `
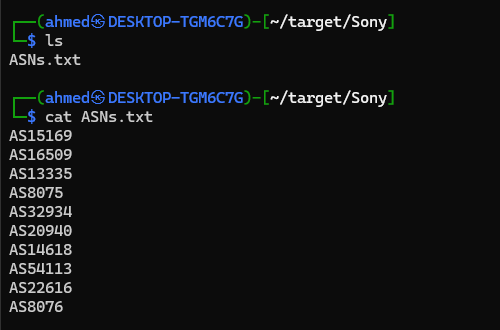
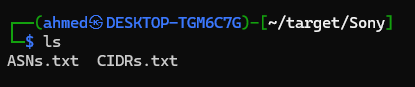
Store the collected ASNs in a text file ( `ASNs.txt` ) for future use
#### 2.2 Collect CIDRs
Once you’ve identified the ASNs associated with your target, the next step is to extract the corresponding **CIDRs (Classless Inter-Domain Routing blocks)** , these define specific ranges of IP addresses managed by those ASNs.
You can use the `whois` command with RADb (Routing Assets Database) for the ASNs stored in `ASNs.txt`. Run the following command:
```bash
while read -r asn; do
whois -h whois.radb.net -- "-i origin $asn" | grep -Eo "([0-9.]+){4}/[0-9]+" | uniq
done < ASNs.txt | tee CIDRs.txt
```
After running this, you’ll have a list of all CIDR blocks associated with the ASN, saved in `CIDRs.txt`.
after running the command
#### 2.3 Find IPs from the CIDRs
To convert CIDRs to IP addresses you can run nmap with -sn option in the CDIRs.txt file :
```bash
while read -r cidr; do
nmap -n -sn "$cidr" | grep "for" | cut -d " " -f 5 >> IP.txt
done < CIDRs.txt
```
**Note:** While this method is faster, it may not be the most effective. Some hosts might appear down due to firewalls blocking ping (ICMP) requests or other types of probes.
To address this, we can use **masscan** (which is faster than Nmap) to perform a port scan across all the CIDRs :
```bash
while read -r cidr; do
sudo masscan "$cidr" -p0-65535 --rate=250000 >> IPs.txt
done < CIDRs.txt
```
You can increase or decrease the `--rate=250000` (the number of packets sent per second) based on your network proficiency.
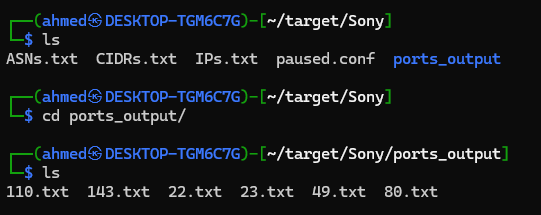
Now you have all the IPs; saved in `IPs.txt`.
For better organization, we should put every IP running services in a single file.
**Organizing IPs by Port**
You can use the following Python script to organize the IPs based on the services they run:
```python
import re
import os
input_file = input("Enter the input file name: ")
output_dir = "ports_output"
os.makedirs(output_dir, exist_ok=True)
ports_dict = {}
with open(input_file, 'r') as file:
for line in file:
match = re.search(r'Discovered open port (\d+/tcp) on (\d+\.\d+\.\d+\.\d+)', line)
if match:
port = match.group(1)
ip = match.group(2)
if port not in ports_dict:
ports_dict[port] = []
ports_dict[port].append(ip)
for port, ips in ports_dict.items():
port_file = os.path.join(output_dir, f"{port.split('/')[0]}.txt")
with open(port_file, 'w') as f:
f.write('\n'.join(ips))
```
After running the script, you will find a directory called `ports_output`. Inside it, you'll see the IPs organized by port, with each port's IPs saved in a separate file (e.g., `80.txt`, `443.txt`, etc.).
What I do after that is extract the IPs running HTTP/S services that are accessible through a browser — usually on ports **80, 443, 8080, 8443, 8000, 8888**, and **5000** — and put them in a single file.
You can then run **httpx** on these IPs and keep the results organized.
And in my [GitBook ](https://ahmed-tarek.gitbook.io/0x_xnum)notes, under the [Attack Victors by port](https://ahmed-tarek.gitbook.io/0x_xnum/net-pen/attack-vectors-by-port) page, i explained all the other services and their potential attacks based on the ports they run on.
#### 3. Collect Subdmains
#### 3.1 Subfinder
Subfinder is a subdomain discovery tool that discovers valid subdomains for websites. Designed as a passive framework to be useful for bug bounties and safe for penetration testing.
To get the most out of Subfinder, go to its config file and add your API keys from these platforms at the end of the `config.yaml` file:
* [binaryedge](https://www.binaryedge.io/)
* [censys](https://censys.com/)
* [chaos](https://www.chaos.com/)
* [github](https://www.github.com/)
* [intelx](https://intelx.io/)
* [robtex](https://www.robtex.com/)
* [securitytrails](https://securitytrails.com/)
* [shodan](https://www.shodan.io/)
* [spyse](https://spyse-dev.readme.io/reference/quick-start)
* [urlscan](https://urlscan.io/)
* [virustotal](https://www.virustotal.com/)
* [zoomeye](https://www.zoomeye.hk/)
Just sign up for accounts on these sites, and you can get your API keys from the settings section. Keep in mind that these API keys are free but have a limited number of requests, so change them out now and then.
Subfinder’s configuration file is located at:
```bash
nano ~/.config/subfinder/config.yaml
```
dont get ur hopes up, these API keys are fake
Once you’ve added the APIs, run Subfinder again and see how much more you uncover compared to before!
#### 3.2 Amass
**Amass** is a powerful tool for network mapping and external asset discovery. It combines both passive and active techniques to uncover subdomains linked to a target.
For passive enumeration, you can run the following command:
```bash
amass enum --passive -d example.com -o example.com.subs
```
This command will gather subdomains without actively probing the target.
For active enumeration, which includes brute-forcing and resolving IP addresses, use:
```bash
amass enum -src -ip -brute -min-for-recursive 2 -d example.com -o example.com.subs
```
This command not only discovers subdomains but also gathers source information and performs IP resolution, providing a more comprehensive view of your target.
By leveraging Amass, you’ll be able to effectively uncover a wide range of subdomains, significantly enhancing your reconnaissance efforts!
#### 3.3 Assetfinder
it can find domains and subdomains related to a given domain, and find the subdaomins of the subdaomins :
```bash
assetfinder -subs-only target.com // find subdomains for a domain
assetfinder -subs-only sub.target.com // find subdomains of a specific subdomain
```
#### 3.4 some good website
There is also some good websites like [crt.sh](https://crt.sh/) and [subdomainfinder](https://subdomainfinder.c99.nl/)